
GPX & elevation profile
Drop in the GPX file of a hike, a bike ride or a run. It becomes a route on your map, with an elevation profile below it: distance, ascent, descent and the highest point.
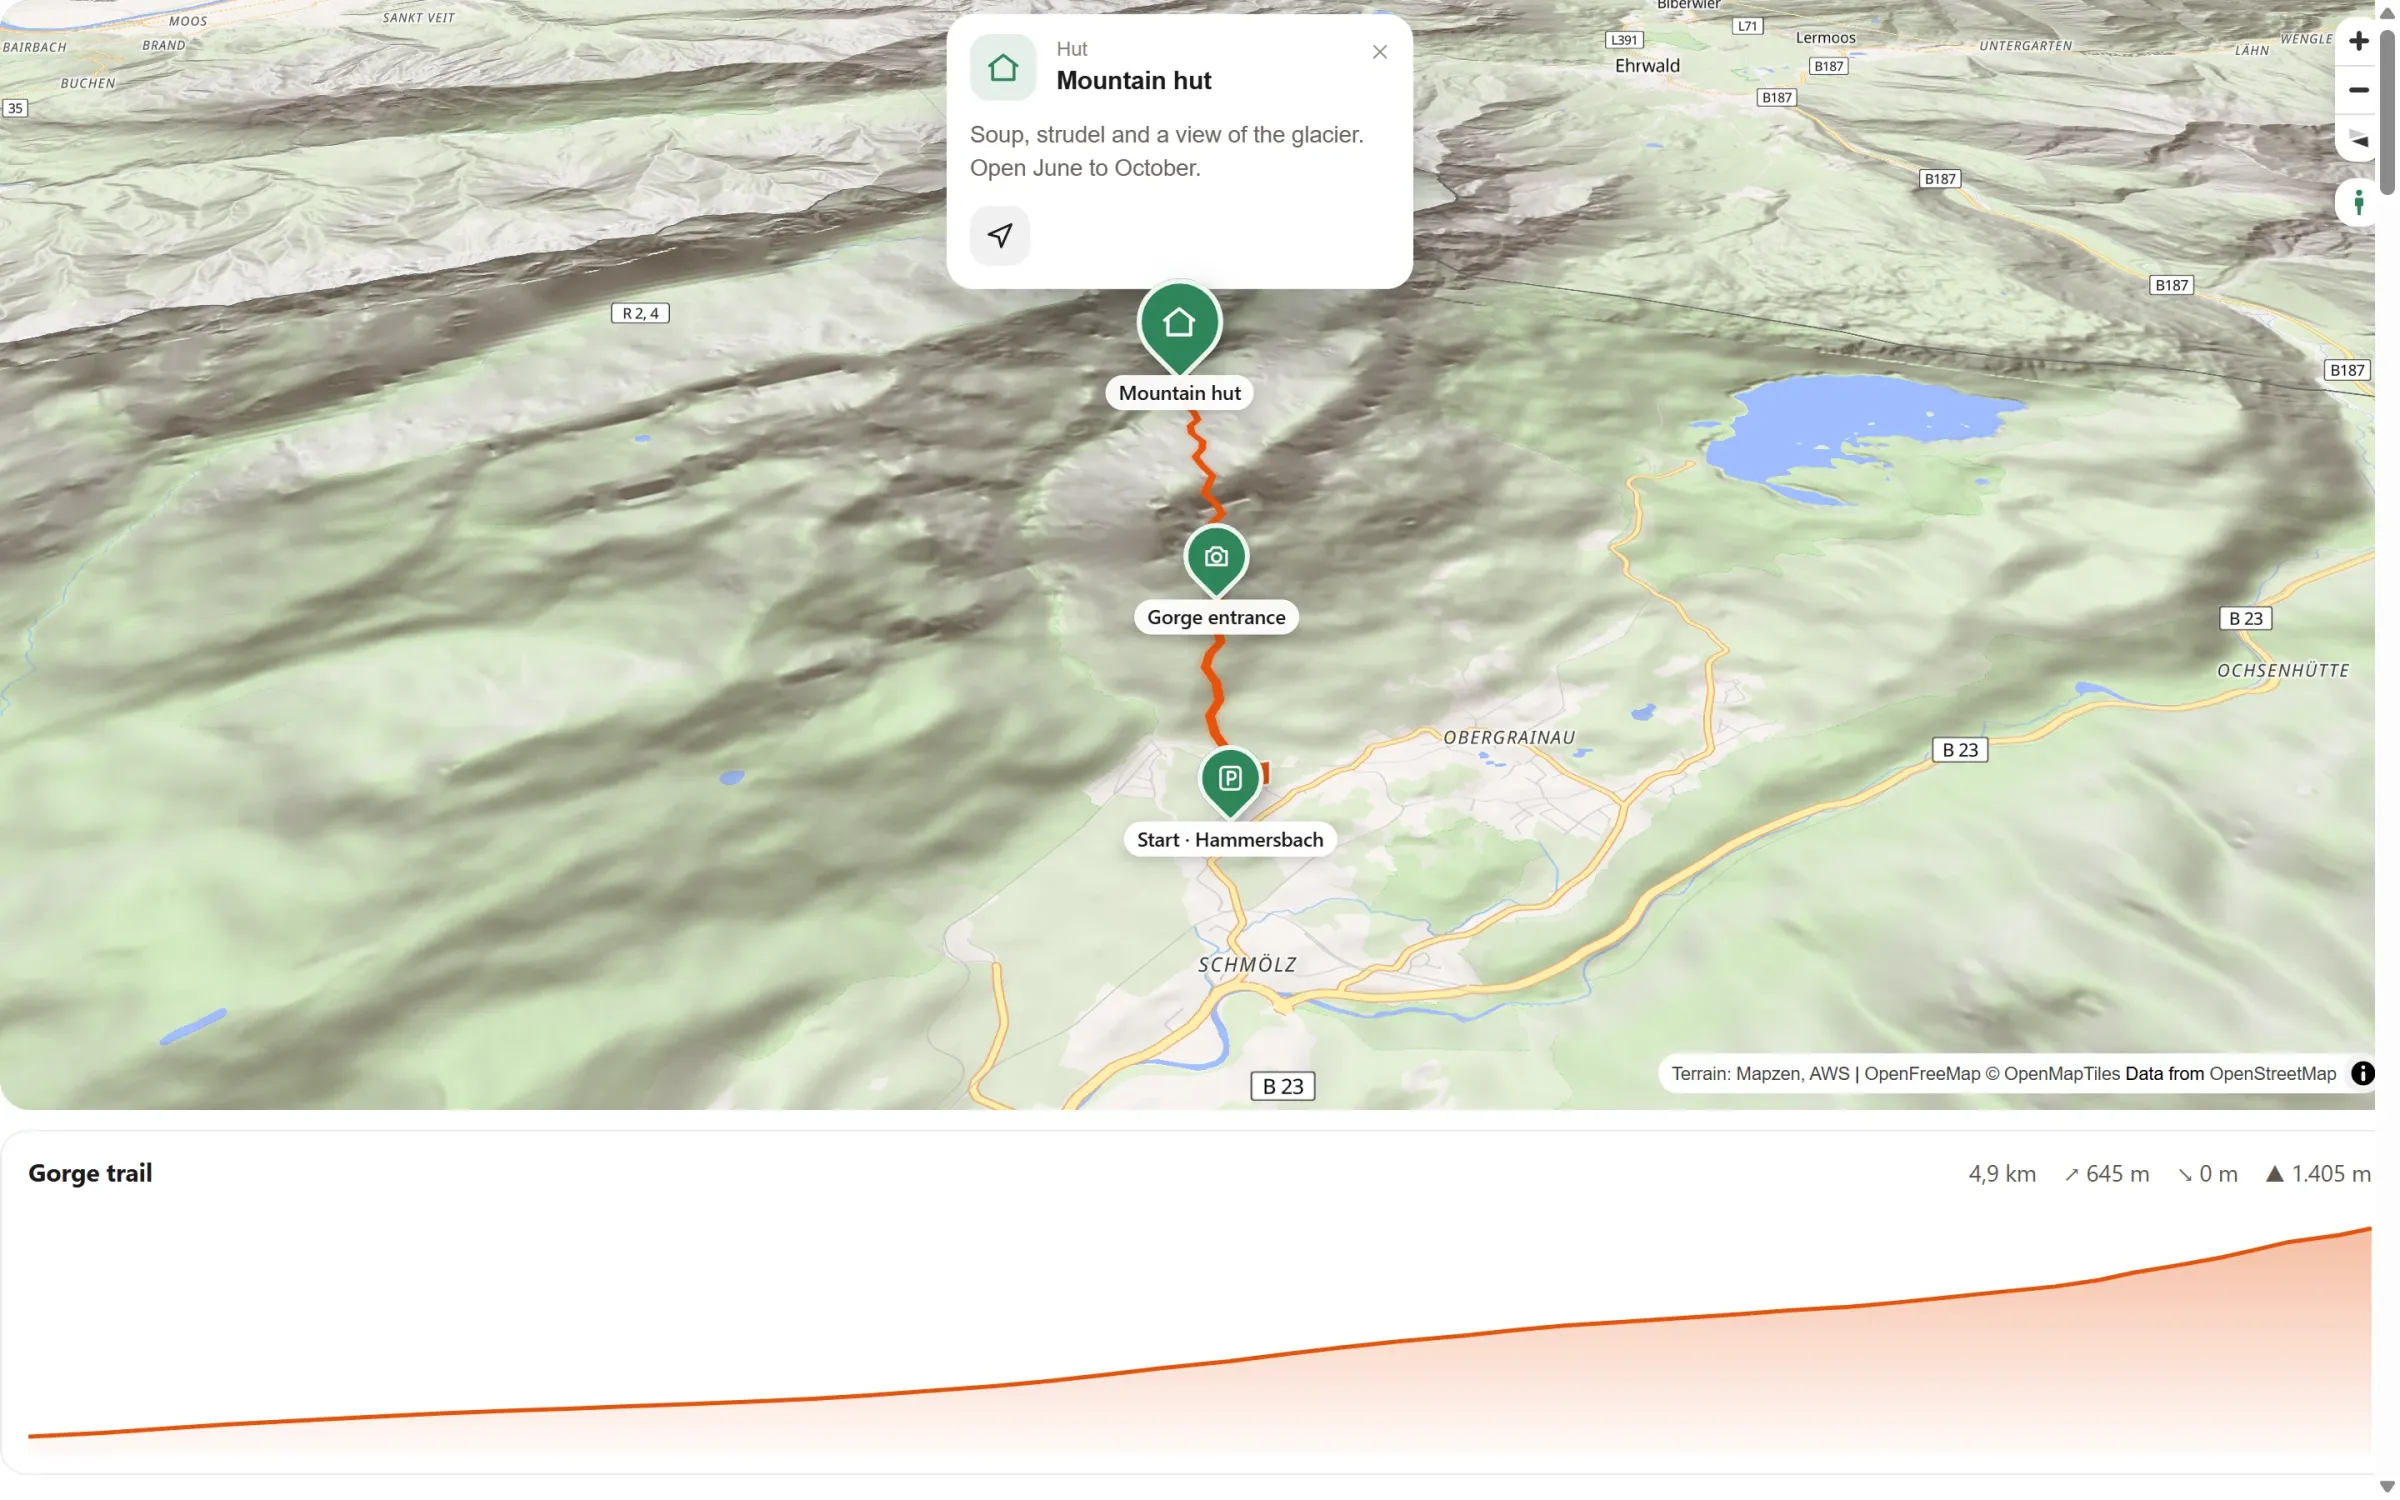
How far, how high, how steep
The whole track
Every bend of the file on your map, with a flag at the start and a chequered flag at the finish if you like.
The numbers that matter
Distance, ascent, descent and the highest point, shown right above the profile.
Follow the profile
Move the mouse or a finger along the profile: a dot shows the spot on the map, with the kilometre and the height.
Several tracks
Import a few stages. Each route with a profile gets its own, one below the other.
From file to map in three steps
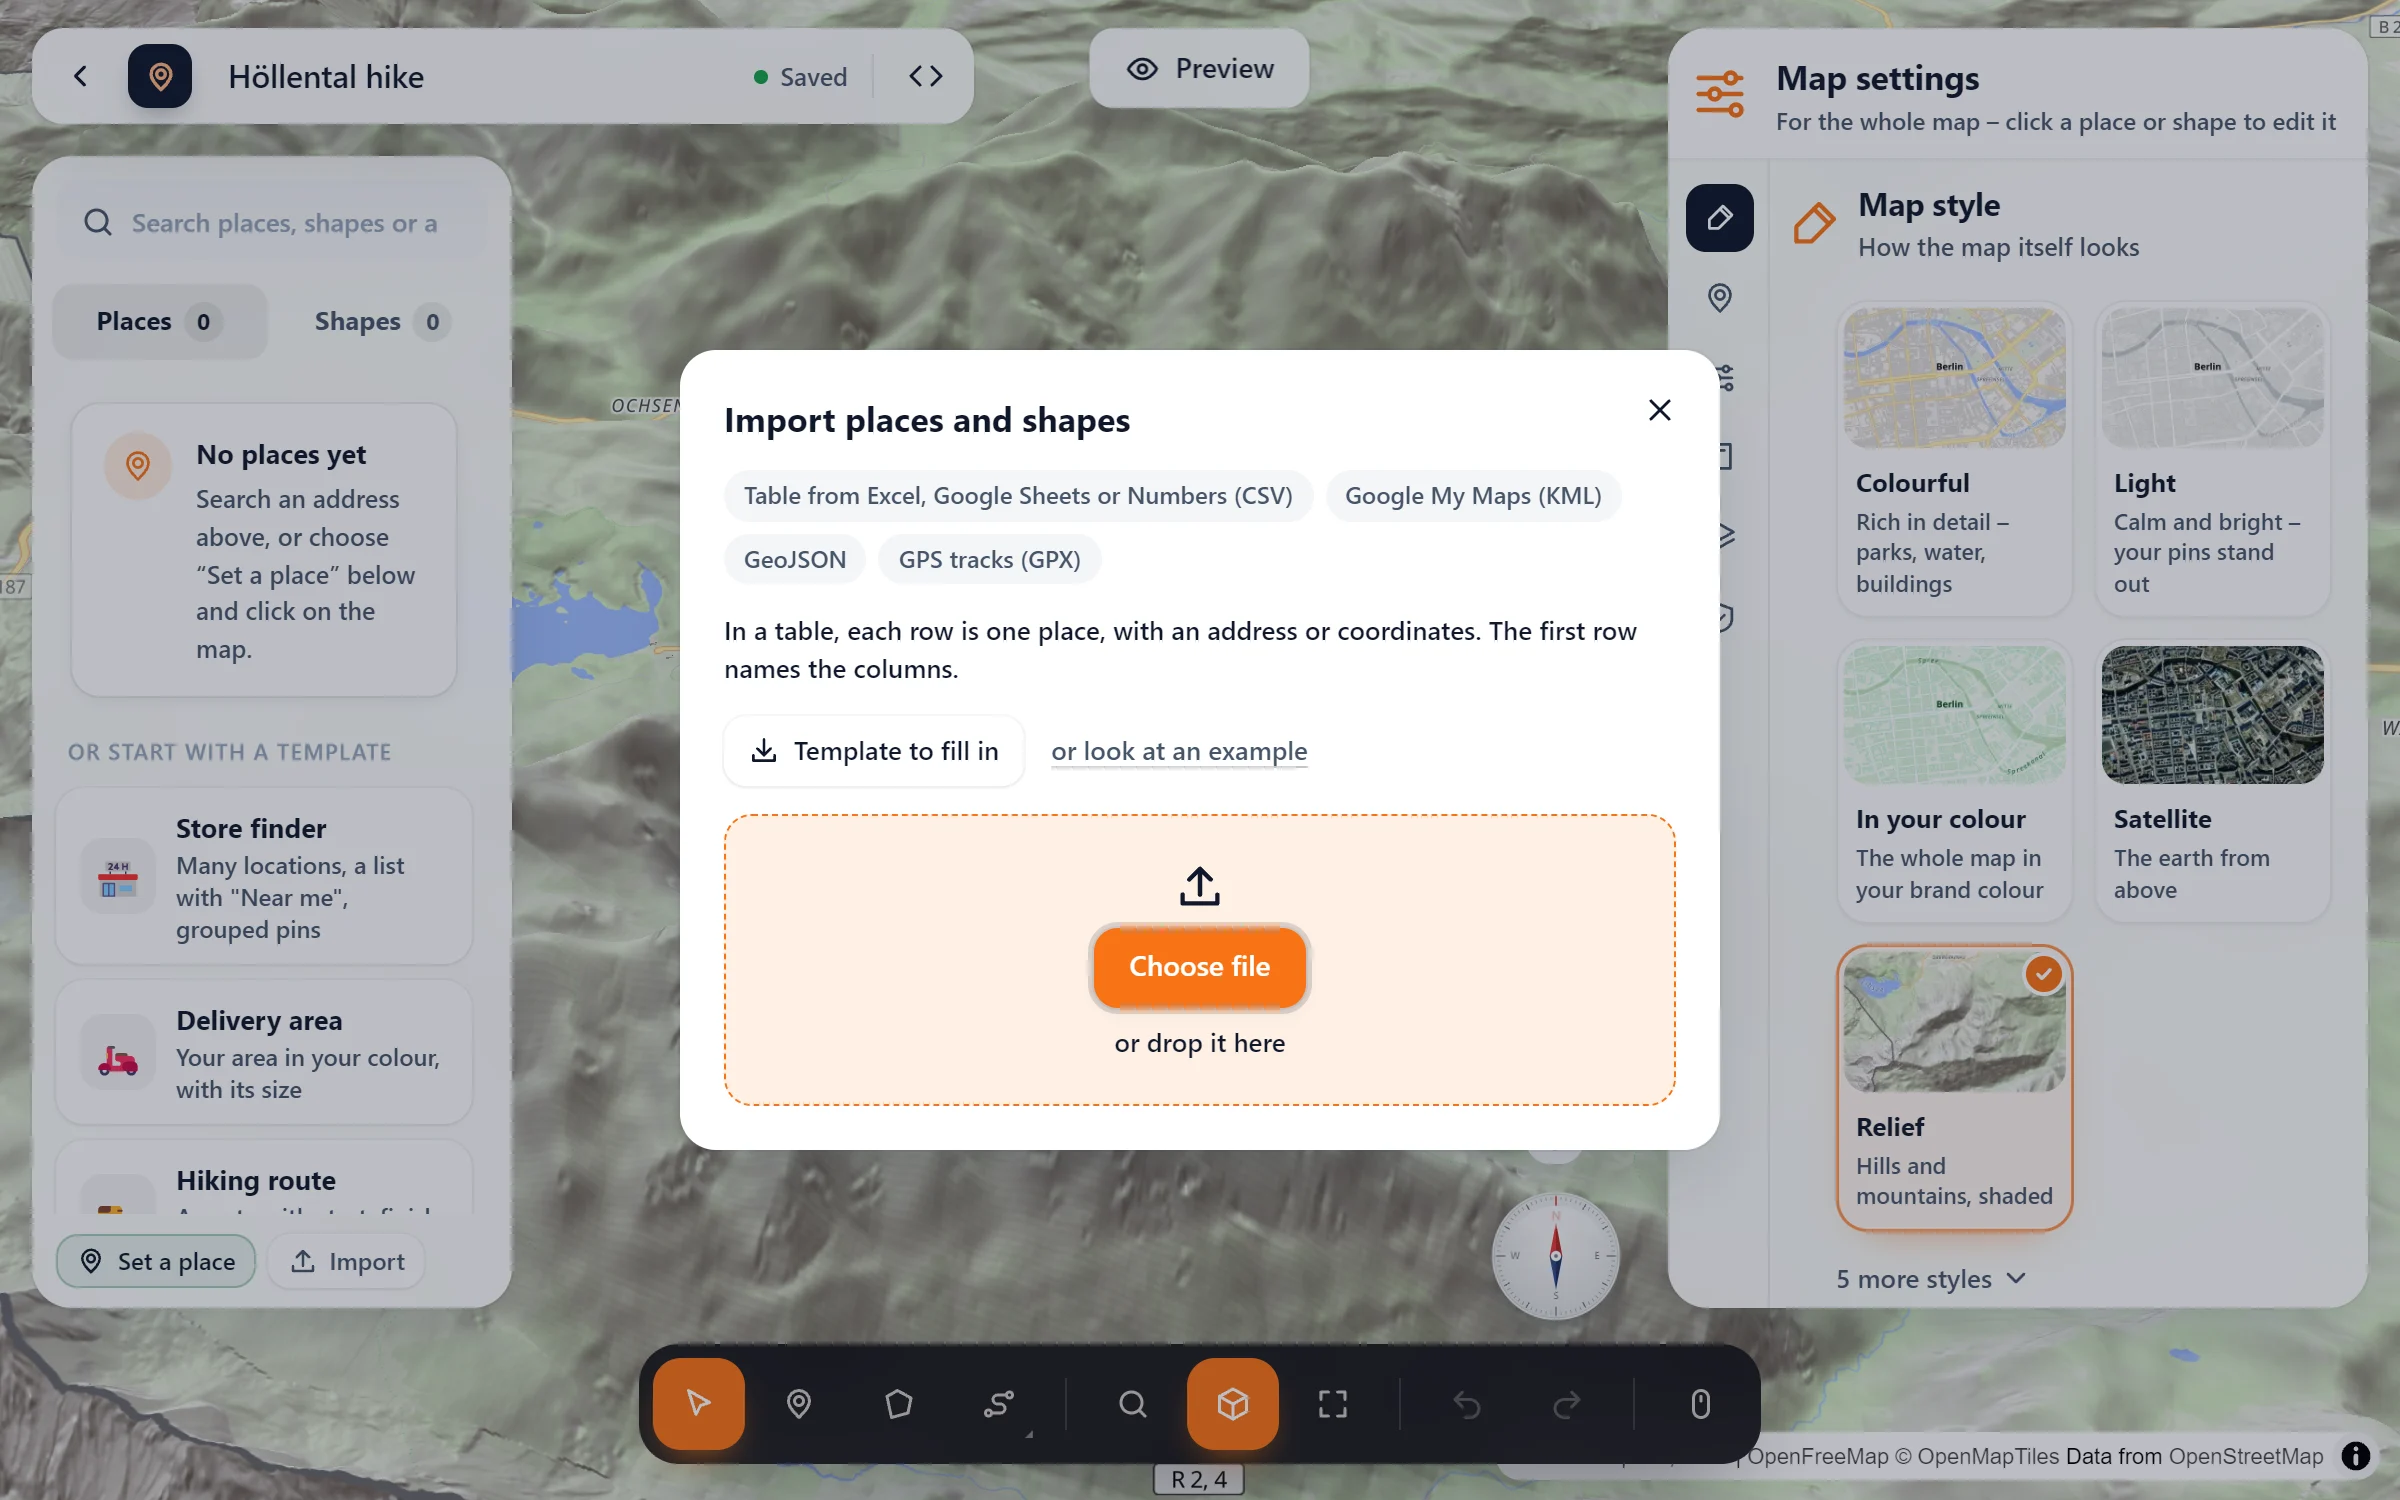
- Import the file. In the studio, click “Import” and choose your .gpx file, or drop it there. Tracks and routes both work, and the route takes the name in the file.
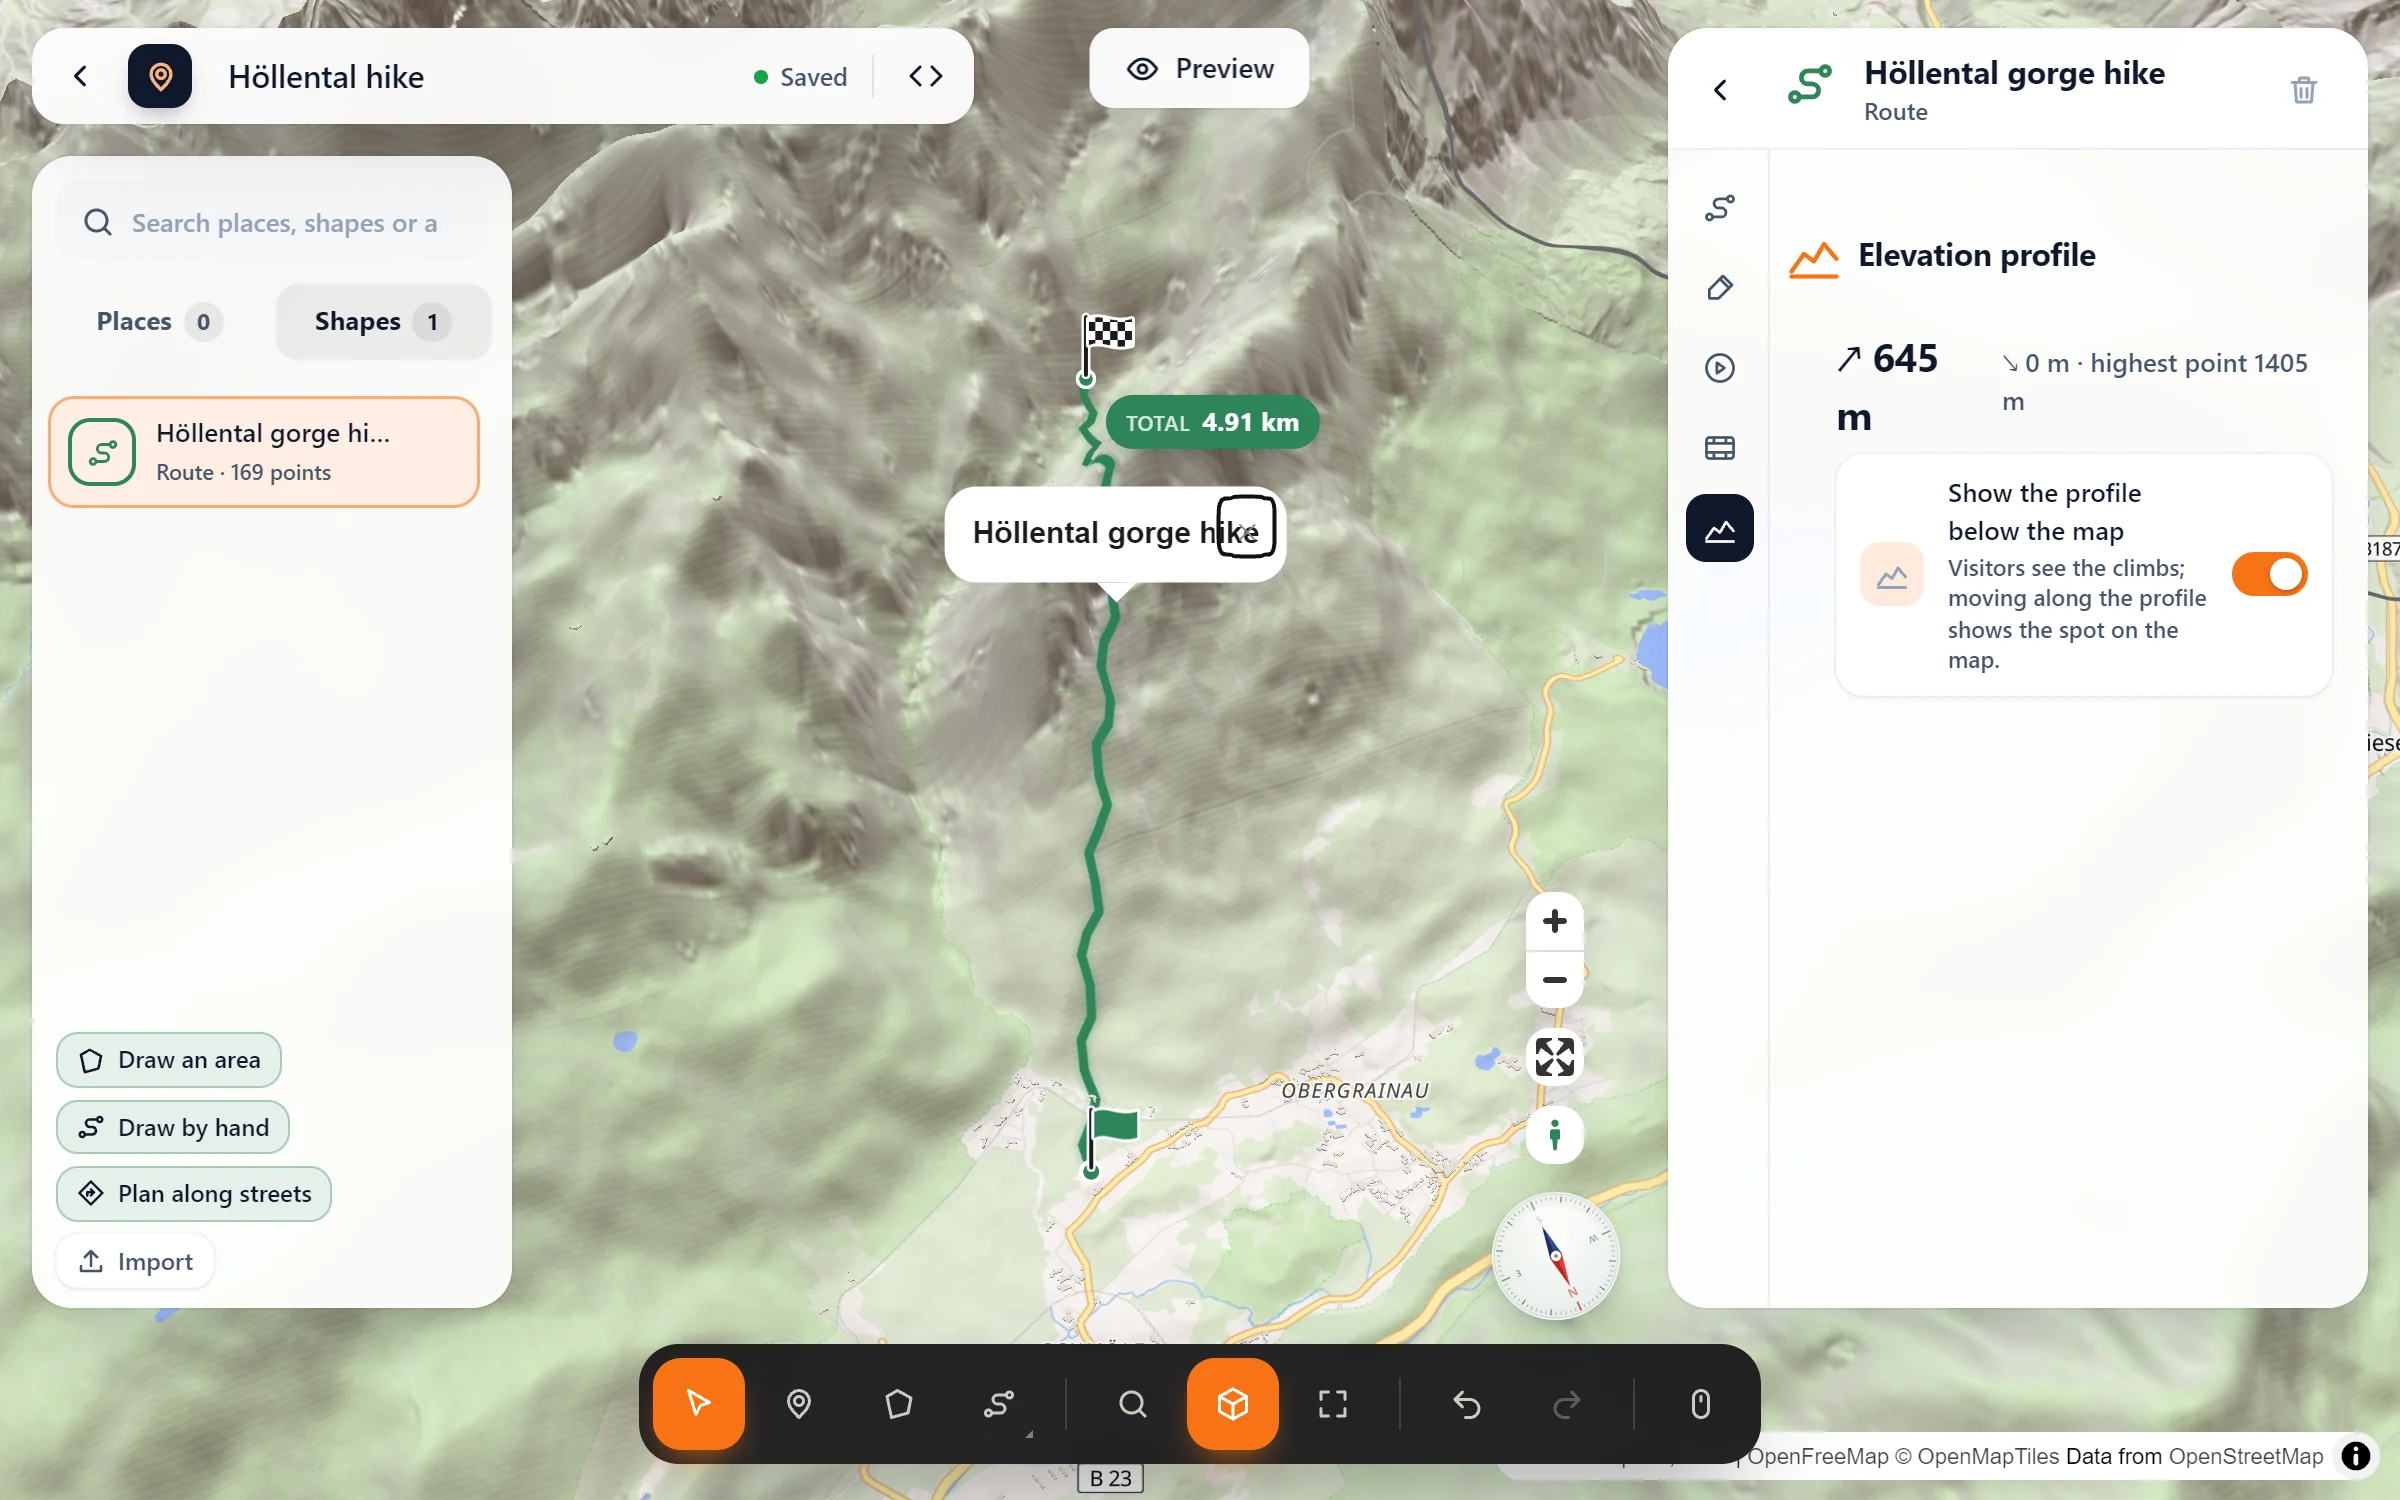
- Check the profile. Click the route: its “Elevation profile” tab shows ascent, descent and the highest point. “Show the profile below the map” is already on.
- Add the rest. Mark parking, huts and viewpoints as places and pick a style such as relief. Then put the map on your page.
Questions people ask
Where do the heights come from?
From the GPX file itself, so no elevation service is asked for the profile. A file without heights still becomes a route, just without a profile.
My file has thousands of points. Is that a problem?
No. Long tracks are thinned to at most 2,000 points, keeping the bends and the climbs. Tiny ups and downs of a few metres are GPS noise and don’t count as ascent.
Can I change the route after the import?
Yes, like any route: name, colour, line width and style, start and finish flags, and its points. With “Ride along”, visitors can also let the camera fly along it to the finish.
Is it part of the free plugin?
GPX import and the elevation profile come with Map Studio Pro. Routes you plan along roads or draw by hand, with their length, stay free.
Who shows GPX tracks
- Hiking guides and mountain huts
- Bike shops, tours and rentals
- Running clubs and race organisers
- Tourism offices with signposted trails
- Travel blogs with their day stages
- Schools and clubs planning outings
Part of Map Studio Pro
Pro adds it to the plugin you already have. Everything in the free version stays free and complete.